Bring Your Walls to Life with Handmade Texture

Step into the tactile world where light dances across imperfect surfaces. Today we explore DIY Textured Wall Finishes: Limewash, Plaster, and Paneling, showing how mineral color breathes, troweled layers sculpt depth, and simple boards add architecture, with real tips, pitfalls, and stories that spark confident, creative action.

Start Strong: Tools, Materials, and Surface Prep

Every memorable, touchable wall starts long before the first stroke or trowel mark. Thoughtful preparation prevents bubbling, cracking, and disappointment by addressing moisture, adhesion, and texture at the source. Learn to read existing layers, choose primers that respect mineral chemistry, and assemble a toolkit that streamlines your workflow while keeping dust, splatter, and fatigue under control. With patient prep and smart materials, you gain speed, safety, and a clean canvas that welcomes limewash, plaster, and paneling with confidence.

Limewash: Cloudy Depth and Soft Movement

Mineral-rich and wonderfully breathable, limewash transforms flat planes into living color that shifts with daylight. It cures by absorbing carbon dioxide and forming calcium carbonate, creating velvety variation rather than hard-edged contrast. Expect transparency, layered nuance, and subtle clouding that hides small imperfections while celebrating honest texture. I still remember a hallway revived over two weekends: thin coats, patient drying, and a final buff, revealing a restful glow that felt ancient, calm, and unmistakably handmade.

Mixing and Tinting for Nuance

Start with manufacturer-recommended ratios, then make test cards in several dilutions, noting pigment loads with painter’s tape and a marker. Mineral pigments behave differently than universal tints, offering gentle, earthy shifts instead of artificial pops. Keep mixtures well-stirred because heavier particles settle quickly. Paint samples on multiple walls and view them morning, afternoon, and evening. Slight tweaks in water content change translucency dramatically, allowing layered veils of color to read like soft weather moving across your room.

Brushwork That Paints with Light

Use a wide, natural-bristle brush and work in generous figure-eight or cross-hatch motions to avoid visible stop lines. Keep a wet edge, feathering new areas into damp ones so movement looks coherent, not patchy. Thin coats beat thick coats for calm diffusion. Let each layer dry fully before deciding on more; impatience causes scuffing and uneven sheen. If corners intimidate, pre-cut them lightly and blend immediately into larger fields, building a seamless, quietly dynamic surface that rewards slow attention.

Curing, Sealing, and Patina

Limewash matures as it carbonates, so expect soft changes over days and weeks. In high-touch zones, consider a compatible mineral sealer or gentle wax recommended by your brand, but remember many sealers reduce breathability and flatten nuance. Ventilate well, avoid aggressive cleaning early, and embrace the tender initial period. As the finish hardens, its powdery feel recedes into tranquil matte depth. When scuffs appear, spot-rework with a diluted pass, letting the patina accumulate gracefully rather than chasing sterile perfection.

Confident Base Layers

Your first coat sets the narrative. Keep it thin, consistent, and slightly open, giving later passes somewhere to bond and bite. Skim over joints and repairs, then scrape ridges before they harden into obstacles. If you spot chatter from your trowel, adjust angle and pressure rather than pushing harder. Pay attention to room humidity; edges should set evenly, not dry too fast under a heater. Each thoughtful decision protects future layers, reducing sanding, dust, and the heartache of preventable rework.

Layering, Burnishing, and Depth

Second and third coats are your storytelling passes. Apply with varied strokes that crisscross, then compress lightly as the set advances, coaxing a whisper of sheen without plastic shine. Strategic burnishing enhances natural variation; skip heavy pressure near damp patches to avoid tearing the surface. Metallic or marble flour accents can sparkle subtly, but restraint keeps sophistication intact. Step back often under different lights, marking areas to revisit. Texture and sheen should travel together like harmony and melody, never competing loudly.

Repairing Imperfections Gracefully

Tiny gouges and trowel kisses are invitations, not failures. Mist lightly, skim with a thinned pass, and feather until the repair dissolves into its surroundings. Color-matched plaster helps, but even with slight shifts, additional translucent coats unify tone. If ridges become stubborn, let them cure, then knock down gently and re-layer. Document your water ratios and timing so successful adjustments become repeatable. Perfection in plaster rarely means uniformity; it means a coherent landscape where evidence of the hand feels intentional.

Paneling: Lines, Shadows, and Instant Architecture

Boards and battens, beadboard, or clean shiplap can frame space with rhythm and quiet gravitas. Good layout avoids awkward slivers and weird intersections, while intentional reveals invite shadows to dance. Wood demands respect for movement, so acclimation, spacing, and fastening matter as much as paint color. In a rental dining nook, cleverly spaced MDF battens, caulked and capped with a slim ledge, created an elegant drop zone that photographed beautifully, protected plaster from chair scuffs, and felt custom without overspending.

Testing in Real Conditions

Paint sample boards and move them through the day. Morning sun may sparkle on a burnished plaster patch that feels too shiny at night. Dimmer warm bulbs might sweeten a cool gray limewash into something silvery and gracious. Photograph tests on your phone to compare impressions later; our memories cheat under changing light. Trust slow observation, because the finish you love for ten minutes should also comfort you after long weeks of breakfasts, deadlines, and quiet, restorative evenings at home.

Harmonizing Textures Across Spaces

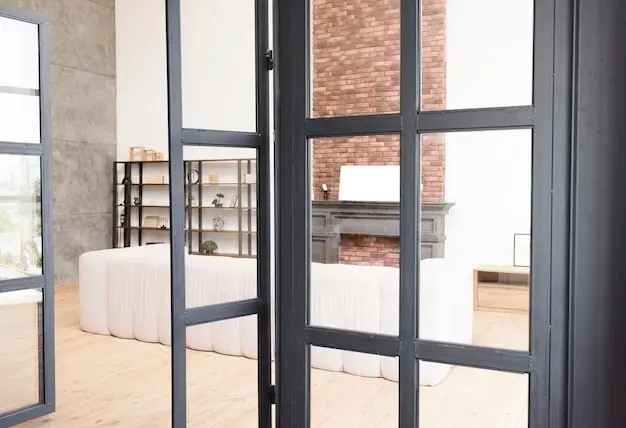
Let finishes converse. A softly clouded limewashed hallway can usher guests toward a restrained plaster dining room, with paneling grounding the entry bench for shoes and bags. Keep undertones speaking the same language even when colors differ. Reuse pigments at reduced ratios to whisper continuity. Vary scale thoughtfully: small rooms handle delicate movement, while larger walls welcome bolder trowel sweeps or broader battens. The goal is a melodic home, not a museum of disconnected experiments competing for attention and approval.

Small-Space Strategies That Work

In compact rooms, low-contrast palettes and gentle textures prevent visual clutter. Limewash softens edges, making corners recede, while a slim chair rail with narrow battens adds order without heaviness. Use mirrors to bounce light across plaster highs and underplay lows. Keep furniture legs visible, not skirted, so texture breathes. Aim for a few deliberate gestures rather than many small ones. The result feels curated and calm, a welcome exhale where your eye can rest without tripping over busy, competing details.

Budget, Timeline, Safety, and Lasting Care

Cleaning Without Flattening Texture

Reach first for soft brushes and slightly damp microfiber cloths to avoid polishing away texture. Skip harsh chemicals on limewash and many plasters; spot-treat gently, then allow surfaces to dry fully before deciding what’s next. For paneling, a mild soap solution followed by quick drying keeps joints sound. Record what works by finish, brand, and room conditions. Gentle care retains the precise qualities you labored to create: tender movement, crisp shadow lines, and that irresistible handmade invitation to touch and linger.

Touch-Ups and Seasonal Checks

Keep a labeled jar of diluted limewash or a small batch of color-matched plaster ready for nicks near doorways and baseboards. For paneling, inspect caulk lines and seams after seasonal humidity swings, addressing gaps before dust settles inside. Photograph any recurring trouble spots and track climate notes; patterns reveal smart, preventative fixes. Small, consistent attention beats dramatic overhauls later. These quick rituals protect your investment of time and care, and they transform maintenance into a satisfying, reflective part of home life.

Share, Learn, and Celebrate Together

Post your before-and-after shots, limewash test boards, and beloved trowel patterns, and tag fellow makers who inspired your courage. Ask questions in the comments, describe what surprised you, and subscribe for future guides and real-world case studies. Your experience might unlock someone else’s stubborn problem, while their trick saves your next weekend. This exchange of methods, missteps, and triumphs multiplies everyone’s skill and delight. Keep the conversation generous and specific, and watch your walls—and confidence—grow richer with every shared insight.
Faritelizavo
Privacy Overview

This website uses cookies so that we can provide you with the best user experience possible. Cookie information is stored in your browser and performs functions such as recognising you when you return to our website and helping our team to understand which sections of the website you find most interesting and useful.